What are Event Phases?
Event Phases organize activities and modules to add workflow to your events. Each event is made up of a series of phases that guide end users through their recap completion.
With Phases you can:
- Create single or multiple event phases
- Customize event phases with activities and modules
- Require individual phase approval
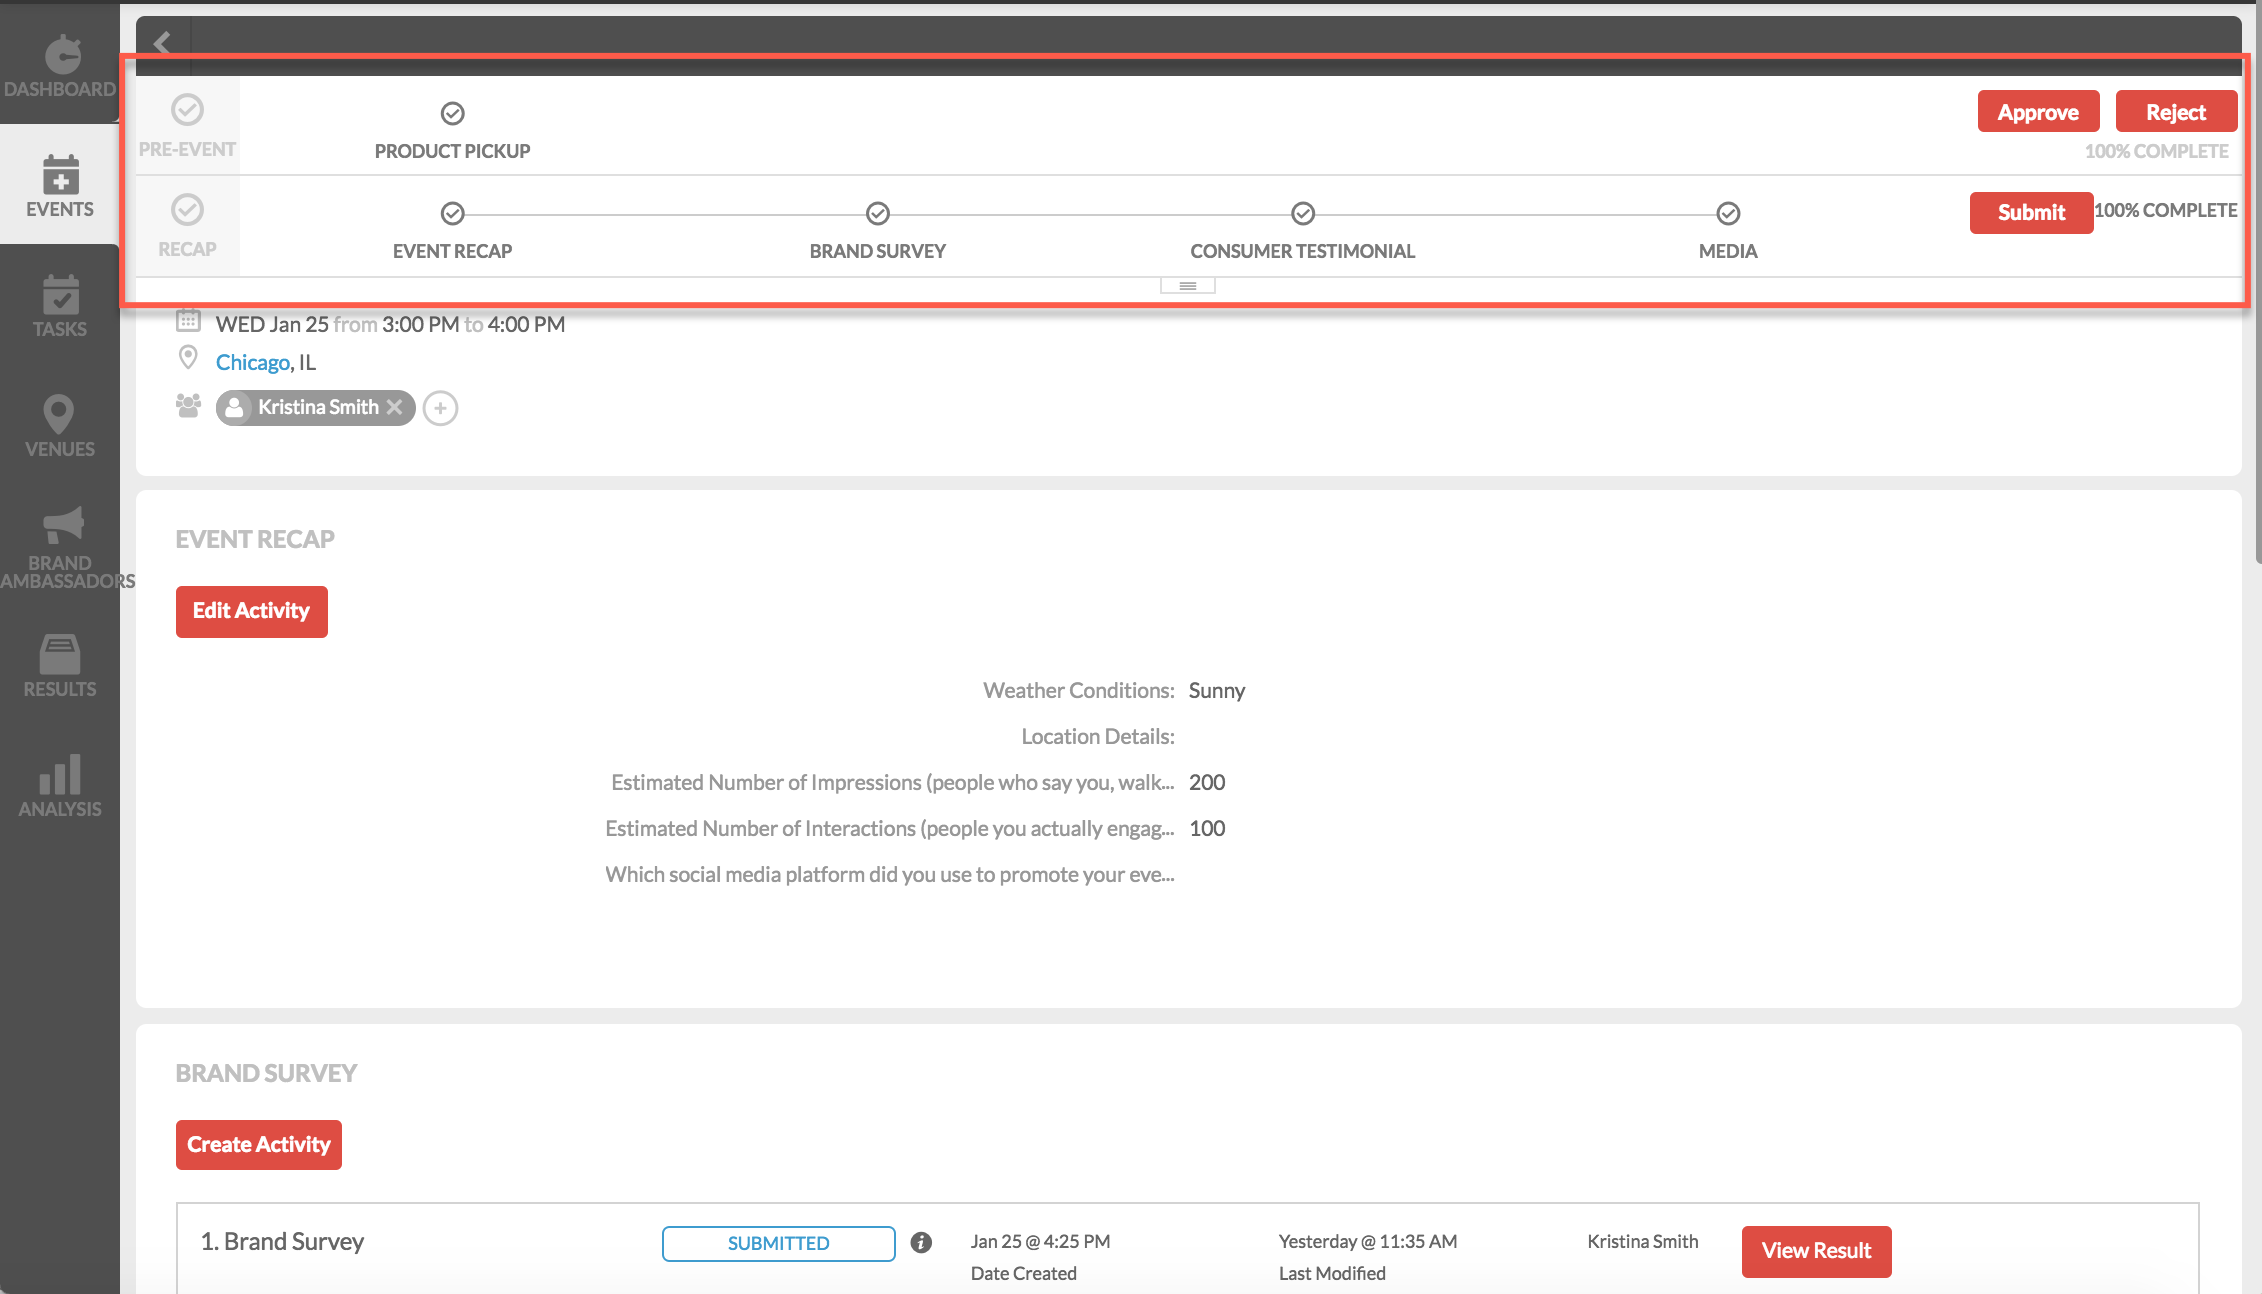
For example, the image below is the event details page. At the top, we can see that the event is split into two event phases; Pre-Event and Recap. Administrators can create custom phases that move end users through a series of activities and modules.

How to Create an Event Phase
1. Select Campaigns from the admin dropdown and either select your campaign from the campaign list or create a new one.

2. Once your campaign is open, click the + Add a Phase button in the Campaign Builder tab.

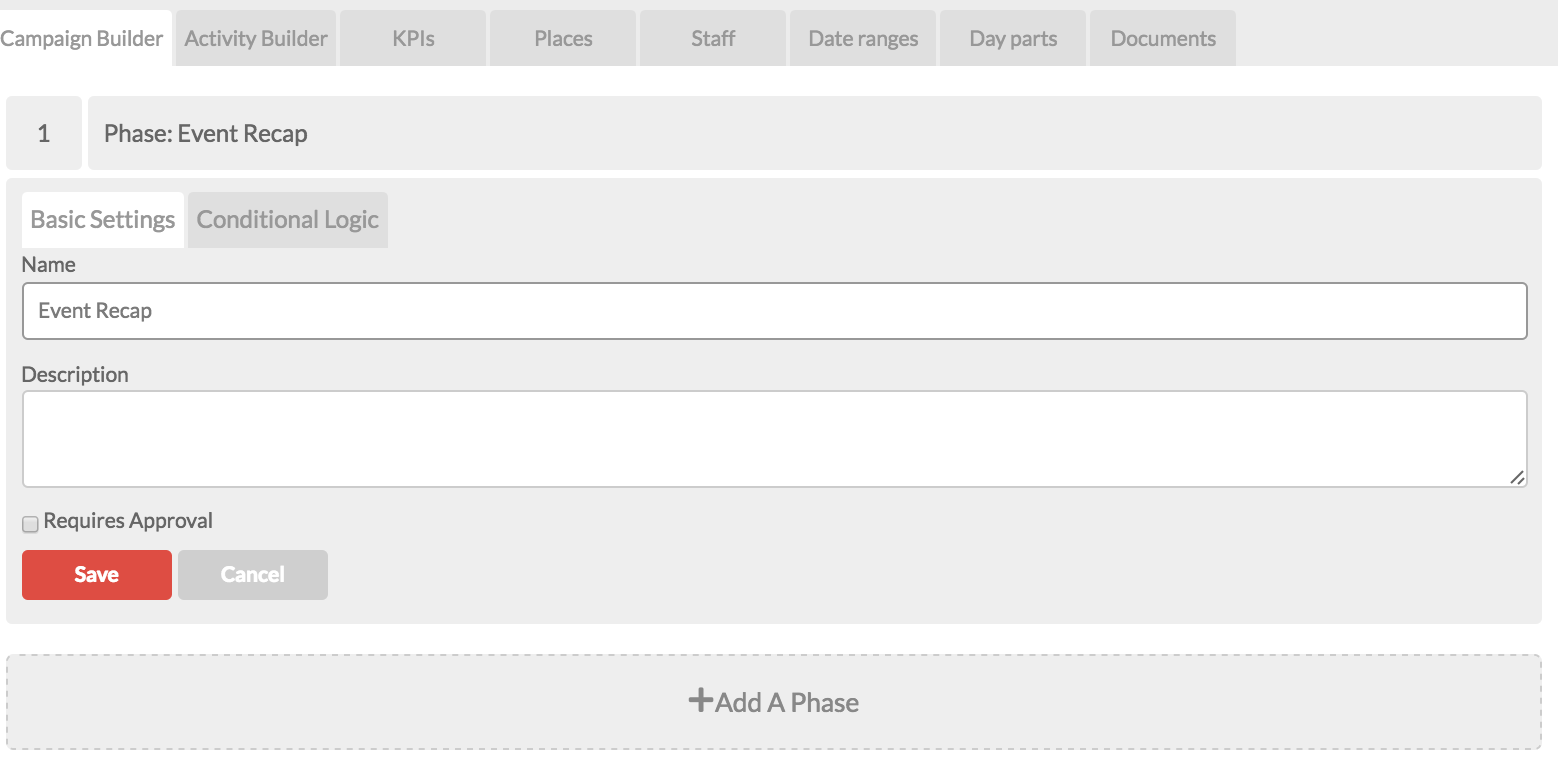
3. Click on the Phase to open the Phase settings. From this screen you can update basic settings and add conditional logic.

Edit Phase Name, Description and Require Approval
From the Basic Setting tab you can add a Phase name, description and requirement.
Selecting the requirement checkbox requires that end users submit the phase for approval. If you do not select the Requires Approval checkbox there will not be an approval process for this phase.
Add Conditional Logic
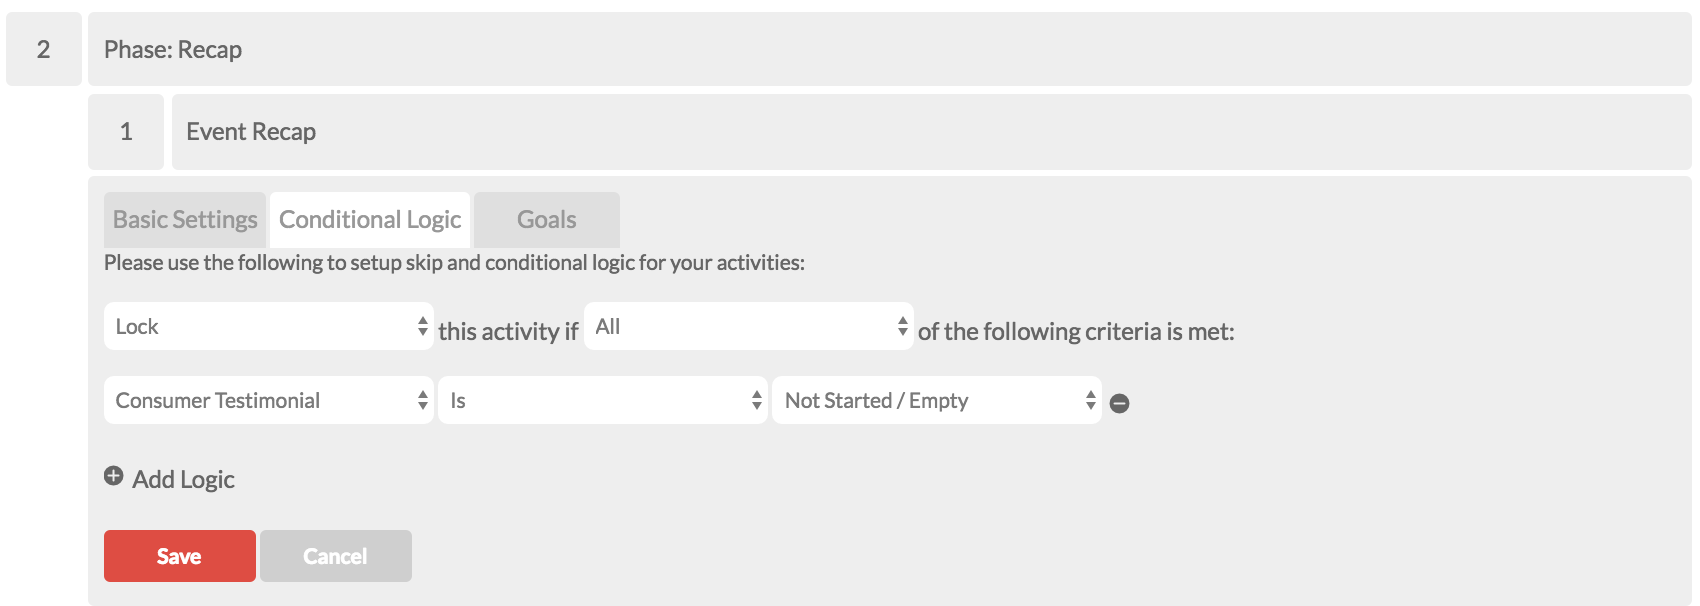
The Conditional Logic tab enables you to lock or unlock phases based on certain criteria. For example, if you have two phases, Pre-Event and Post-Event, you can add conditional logic to lock the second Post-Event Phase until the Pre-Event phase is complete.
To add conditional logic, click the + Add Logic button.

Use the first set of dropdowns to select whether you would like the phase to lock or unlock if certain criteria are met.
Next, use the second set of dropdowns to specify the criteria that must be met.

4. Click the red Save button to save your phase.
5. To add additional Phases, click the + Add Phase button and repeat above steps.
Organize and Deactivate Phases
To remove a Phase, hover over the Phase name and click the trash can button.
![]()
To reorder Phases, click and drag up or down the phase list.
Add Activities and Modules to Phases
The final step to creating phases is to add activities and/or modules.
Add Activities
1. To add activities, go back to the Campaign Builder tab.
2. Use the right panel to drag and drop activities and modules into your different phases. You can reorder activities by clicking and dragging up or down the list.

Edit Activity Settings
Select an activity from the list view to open the activity settings.

Edit Basic Settings
From this tab you can:
- Update the Display Name by clicking into the Display Name field.
- Add a Display description by clicking into the Description field. The description that you add to this field will display in the event details page.
- Set a module due date by entering a date into the Due Date field.
- Require the module by checking the Required box.
- Display the activity as multiple activities by checking the Show as Multiple Activities box.
Edit Conditional Logic
From the Conditional Logic tab you can lock or unlock activities based on certain criteria.

Goals
Deactivate Activities from Phases
Hover your cursor over the activity and click the trash can button.
![]()
Add Modules to Phases
1. Use the right panel to drag and drop modules into your phase(s). You can add the same module to multiple phases.

Edit Module Settings
Select a module from the list view to open the settings tab.

Edit Basic Settings
From this tab you can:
- Update the Display Name by clicking into the Display Name field.
- Add a Display description by clicking into the Description field. The description that you add to this field will display in the event details page.
- Set a module due date by entering a date into the Due Date field.
- Require the module by checking the Required box.
Edit Conditional Logic
From the Conditional Logic tab you can lock or unlock modules based on certain criteria.

Deactivate Modules from Phases
Hover your cursor over the module and click the trash can button.
![]()
0 Comments